See The Light Van Gogh and Sunflowers Project ~ Review and giveaway!

See The Light Van Gogh and Sunflowers Project ~ Review and giveaway!


Back in January our family went to see the Van Gogh Exhibition at the Denver Art Museum and loved it. So when I was asked by See The Light if I would review the Van Gogh Sunflowers project, I excitedly said yes!   While I knew that the project dvd by See The light might be a little difficult for my younger two kids (it is recommended for ages 10+), I knew my oldest daughter could do it.   When the dvd arrived, I don’t know who was more excited, me or my daughter!

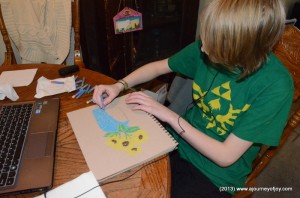
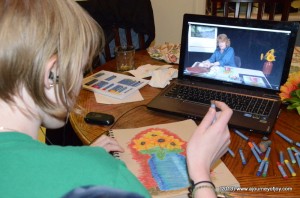
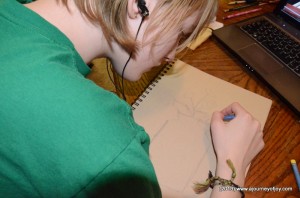
Sarah tracing out her design

The Sunflowers dvd is divided into 4 lessons.  Each lesson is about 25 minutes long.  The first lesson, Pat Knepley begins talking about Vincent Van Gogh and a little bit of his life and how be began drawing and painting.   Van Gogh had a troubled life, but Pat explained about his life in such a way, that truly just shared about his talent and gift of drawing and painting.

Sarah working on the vase.

She began the picture, by doing a basic composition or drawing lightly the outline of what the picture would be.  Once she did that, they began the task of filling in with color in the short stroke technique that Van Gogh used in some of his paintings.  This was just a basic color to get the outline of the vase, flowers and leaves.

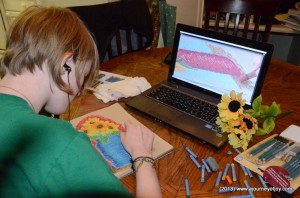
Sarah listening and watch the dvd while filling in some lines.

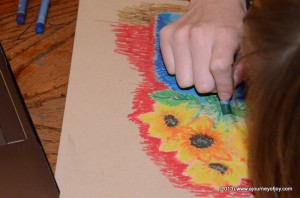
Once she finished that, she then started adding in more colors to fill the picture out and blending in the colors together.

Sarah working on the leaves.

My daughter truly had a wonderful time with this DVD.  Van Gogh is one of her favorite artists and it just helped her to understand Van Gogh a little more, by attempting  a technique that he used.  When I first suggested her doing this DVD, she didn’t think she could do it.  My daughter is very talented with a pencil and paper, but she has never tried any other art medium like this before.

working on blending in the colors.

Once she started, Pat Kenpley gave my daughter the confidence that she needed to where now, she is looking forward to trying different mediums out.  I also love how in every lesson, Pat brings out her bible and reads scripture from it.  There is always a bible lesson in every art lesson that See The Light does.  I, for one, am very thankful for a company standing firm on the word of God.

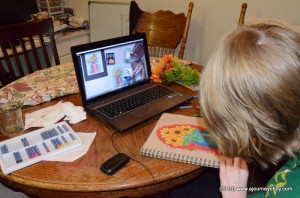
Listening to final instructions on the dvd.

I asked my daughter what her thoughts were on the Van Gogh Project and this is what she said:

“What I really enjoyed about the Van Gogh project was the techniques given in the DVD. They were clearly explained, and I understood how to execute the techniques to finish the sunflowers.The information on Van Gogh’s life was also well explained, and I definitely want to look more into his life as a painter. Honestly, I had never used oil pastels before, and I now I prefer to use them over other mediums. The lessons really helped expand my artistic abilities, and I look forward to learning more!”


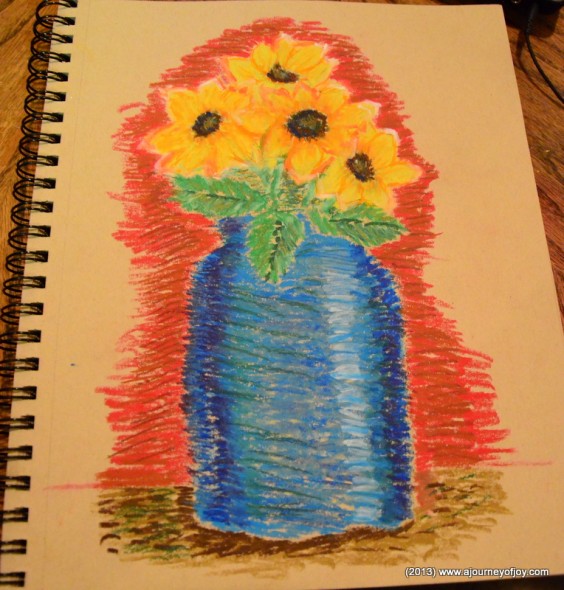
Sarah’s final picture of her interpretation of Van Gogh’s Sunflowers painting.

As you can tell, my daughter finished and I think did an amazing job.  I am truly proud of her and can’t wait to see the other See The Light Project DVD’s that she does.  We have already ordered 4 more and I do plan on blogging about those as well.  My daughter’s goal is to attend an Art College and we plan on using some of these finished pictures as part of her portfolio.

See The Light has an amazing deal for you all, until March 24th.  You can get the Ultimate Crossmaker Set for only $25.00 (regularly $34.99).  This includes free shipping in the US.   The set includes The Crossmaker DVD, CD of music and audio stories, Black Light with batteries, Fluorescent Chalk and Fluorescent pencils.  Just enter the discount code word, “CROSS”  into the box when you go to check out and hit APPLY!

Now on to some great news!  See The Light art curriculum, has graciously offered to give one of my readers an Ultimate Crossmaker Set!   All you have to do is just leave me a comment, telling me what Easter means to you!  This giveaway will end March 17th, 2013.

**Update** Congrats to Vicki Arnold for being chosen the winner of the Ultimate Crossmaker Set from See The Light!

**Disclosure Policy: I was given this DVD to review, but all thoughts and opinions are my own.  This post contains affiliate links.
Wednesday’s Around the World~ Nahum and Zephaniah

Wednesday’s Around the World~ Nahum and Zephaniah

This week for Wednesday’s Around the World, we read about Nahum and Zephaniah, two prophets sent by God to warn of the destruction and doom to those who did not follow the law of God.

Nahum was a prophet God sent during the time of King Josiah.  Nahum was sent to warn the Assyrians.  Do you remember the Assyrians?  They were known to be brutal warriors.  They treated their prisoners horribly.   The capital of Assyria was Nineveh and it was a very strong city.  They had walls that were 100 feet wide and could support three chariots, side by side on top of that wall.  They had 1500 towers that were 200 feet high!

Nahum warned the Assyrians about their wickedness and told the Ninevites exactly how God would destroy them!

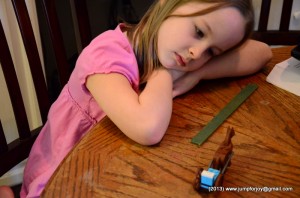
Claire sharing her “chariot”.

Zephaniah was also a prophet during Josiah’s time as King.   His message wasn’t towards the Assyrians, it was towards Jerusalem and surrounding nations.   He talked with those who only outwardly showed love to God, but were lost inside, their heart.  Zephaniah loved to write and wrote to those,  giving them hope in things that were to come.  However, just like Nahum, he also told what would happen if they did not turn to their wicked ways.

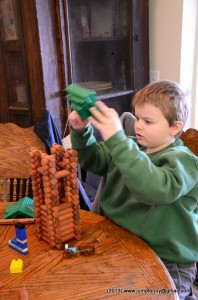
The activity for this lesson, we chose to build a wall and a tower.  We got the Lego’s and Lincoln Log’s out and the kids had a blast building, especially Sammy!  He loved seeing how high of a tower he could build.

Sammy working on his tall tower.

So what have you been learning about in History and Geography?  I would love for you to link up and share with us!  Also, be sure to check out those who link up.  I know I have learned a lot by reading what other homeschoolers have done!


blogging planner review

blogging planner review

Now that I am blogging more and even doing more reviews for homeschooling curriculum, books and other products, I found that I needed a better way of keeping track of the reviews and when they were due. Since I am also now a member of Mosaic Reviews, our first review was of a blogging planner. It couldn’t have come at a better time! I have looked at a lot of different blogging planners over the last several months.  Ones that you can purchase and also ones that are free.  However, there was one blogging planner that I just kept coming back to.  The blogging planner that Mama Jenn designed. I was so excited that it was on the list of planners to choose from.

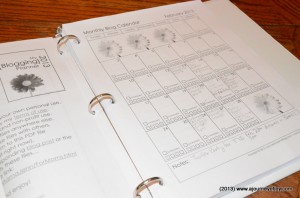
picture of Mama Jenn’s blogging planner is from http://www.mamajennblogs.com/2012/12/my-2013-blogging-planner-free-printable.html

There were several reasons that I chose Mama Jenn’s 50+ plus page blogging planner.   First off, it is a 12 month planner.  I wanted a blogging planner that I could plan for the whole year long.  Each month, she has several different pages grouped together.  The first page is a monthly calendar page.  It has plenty of space to write the title of the post on each date and then has little boxes at the bottom of each day to check off when you have shared it on Facebook, Google Plus, Twitter and Pinterest.

The next page that is in the month section is the monthly blog planning.  You can write down your major posts that you do every month.  There is also a column to keep track of your to-do lists and goals.  She also includes several pages that I can  keep track of giveaways and reviews.  Mama Jenn even included pages for you to keep note and write recommendations down.

Mama Jenn went above and beyond in creating this blogging planner.  She has extra bonus pages that include a full year calendar, a page to help you keep track of your blog stats, a page to write down extra ideas for posts and several blank pages for  you to use any way you need to.

I was extremely impressed with everything that she included in this blogging planner.  I mean, she thought about everything that a blogger does when they sit down to write a post.  Best of all?  This blogging planner is free!

So far, the blogging planner is working really well for me.  It has helped me stay on track and has made it a lot easier for me to plan ahead so that I do not over plan.  Now that I have my blogging organized, time to find a planner to help me organize my homeschooling and house!

How do you stay organized?  Do you use a paper blogging planner or do you use one online?

Wednesday’s Around the World ~ King Josiah

Wednesday’s Around the World ~ King Josiah

Thankful that the sickness has left our home, we are now back with our Mystery of History lessons.  I enjoyed sharing lessons from other homeschool families and I am now excited to share a lesson this week with you for Wednesday’s Around the World.

I really enjoyed this weeks lesson on King Josiah.  King Josiah was Manasseh’s grandson.  You remember who King Manasseh was?  He was an evil King in his younger years, but finally came back to God when he was older.  He repented and God forgave him.  He then did his best to turn the kingdom around before he died.

Josiah was very young when he took over as king.  He was only 8 years old.  They said by the time he was 16, he really loved God.  King Josiah loved God so much that he started going all over the country of Judah and destroying any false idols, false wooden images and alters to Baal.   When Josiah headed back to Jerusalem, he started to restore the Temple that Solomon had built and made an amazing discovery.  They found the Book of the Law!  That’s right, the first 5 books of the Old testament!

Josiah decided that the book would be read to everyone.  Once that started happening, it is said that a revival took place.  They even held a Passover Feast!

Our project for this lesson was to make scrolls.  Scrolls are what the books were written in back in that day.  The first thing we had to do was make tea stained paper.

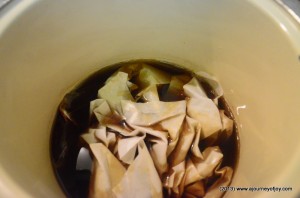
soaking paper in tea.

I boiled the water and then put in two family size tea bags.  I let it steep for about 10-15 minutes, then added 6 crumbled up pieces of white paper.  I then let the paper soak in the tea for about 15 minutes and it was almost too long.  The paper started to rip as I was trying to straighten it out.  I then laid it out flat on the dryer, to dry.  This also took longer than what I had planned.

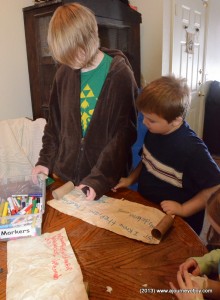
Writing Jeremiah 29:11.

Our next step was choosing a scripture to write on the scroll.  I chose Jeremiah 29:11.

Jeremiah 29:11

11 For I know the plans I have for you, declares the Lord, plans for welfare and not for evil, to give you a future and a hope.

We then took toilet paper rolls and taped them to the scrolls.

taping toilet paper rolls to our paper

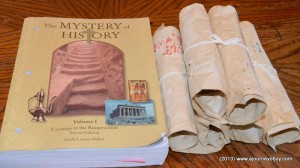
The final step of this project was then rolling them up and tying it with a piece of string, ribbon or yarn.

scrolls rolled up

What all have you been learning about in history?  Have you done any projects lately to help your children understand the lesson better?  I would love to have you join and link up with me!  While you are linking up, be sure to check out the others that have linked up.  We had some great lessons and projects join us this past week!


****disclaimer~ This link-up is not officially affiliated with Bright Ideas Press but is my own project. I am a customer and fan. There are affiliate links in this post.

Wednesdays Around the World~ when sickness hits the family

Wednesdays Around the World~ when sickness hits the family

I am truly enjoying Wednesdays Around the World.  I love seeing others link up with what they have been learning.  This week, I will be highlighting what others have been learning in history.  You see, just when I think we are in the groove with school, something happens.  My children and I ended up sick!  I ended up taking a child to the doctor yesterday because he just was not improving.  He is now on an antibiotic and breathing treatments, as needed.  It is a nasty Upper Respiratory infection.  We are finally on the mend and will begin a full day of school tomorrow.

Now on to sharing what others have been learning in their history lessons.  Lindsay, from Bytes of Memories and her son studied about Joshua, The Battle of Jericho and Rahab.  I loved how creative Lindsay got with this activity.  To help explain the lesson, Lindsay and her son built a city of blocks and used little playmobil men.

Joshua and the Battle of Jericho from Lindsay at www.bytesofmemory.com.

Just head on over and visit Lindsay, her son to see how they learned about The Battle of Jericho!  I know I will be re-doing this lesson with my kids just so we can do her activity!

Ticia and her kids from Adventures in Mommydom learned about what it was like in the Trenches of World War I.  I love how Ticia takes the time to share with her kids that war is not as glamorous as what we are lead to believe.  I love the imagination used, by using pillows and cushions to build the trenches and then using rolled or balled up socks as mortars.

Ticia and her kids building trenches.
http://adventuresinmommydom.org

Be sure to visit Ticia at Adventures in Mommydom to read the full lesson!

I am looking forward to diving back into our history to see what new lessons we can learn.  I would love to have you share with us what you have been learning as well.  Just link up below!

****disclaimer~ This link-up is not officially affiliated with Bright Ideas Press but is my own project. I am a customer and fan.